搬瓦工64M小鸡记录:(一)Nginx反代
之前弄的东西太多太乱,索性重新弄一遍。
0
在vps面板安装debian7.0 x86 minimal(毕竟只有64M)。
apt-get update
解决public key 错误。
apt-get install debian-keyring debian-archive-keyring
apt-key update
Nginx安装
直接安装版本比较老,添加nginx的官方安装源到/etc/apt/sources.list。
deb http://nginx.org/packages/debian/ wheezy nginx
deb-src http://nginx.org/packages/debian/ squeeze nginx
导入key。
wget http://nginx.org/keys/nginx_signing.key && apt-key add nginx_signing.key
apt-get update
apt-get remove --purge nginx nginx-full nginx-common
apt-get install apt-utils dialog
apt-get install nginx
添加模块
要用到nginx_substitutions_filter这个模块进行正则替换,需要把模块编译进nginx然后替换现有的文件。
(之前尝试了其它的方法都没有成功,可能需要安装一些编译用的依赖)
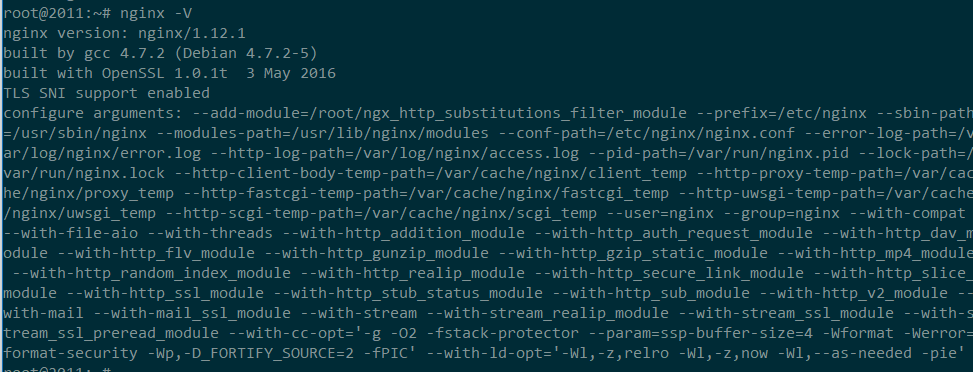
nginx -V查看版本号和编译参数。
下载并解压nginx源码,这里是1.12.1版本。
wget http://nginx.org/download/nginx-1.12.1.tar.gz
tar -xzvf nginx-1.12.1.tar.gz
下载模块源码。
git clone git://github.com/yaoweibin/ngx_http_substitutions_filter_module.git
添加模块并编译。
cd nginx-1.12.1
./configure --add-module=/tmp/ngx_http_substitutions_filter_module [这里是之前查看到的编译参数]
make && make install
配置nginx server
在/etc/nginx/conf.d/下新建'.conf'文件,nginx会自动加载。
server {
	listen 80;
	server_name xxx.mou.science;
	location /.well-known {
		alias /var/www/xxx.mou.science/.well-known;
	}
}
这里的/.well-known 是将xxx.mou.science/.well-known 指向了网站目录下的这个文件夹,申请证书时用来验证。
每次修改后需要重启nginx。
/etc/init.d/nginx restart
使用certbot脚本来申请Let's Encrypt证书。
wget https://dl.eff.org/certbot-auto
chmod a+x certbot-auto
certbot-auto certonly
第一次运行需要安装,要输入邮箱用于提醒。
选择'3: Place files in webroot directory',之后按照提示输入域名,选择网站目录,等待验证通过,证书会保存到本地。
验证通过后再次修改配置(以google为例)。
server {
	listen 80;
	server_name xxx.mou.science;
	rewrite     ^   https://$host$request_uri? permanent; # 重定向
}

server {
	listen 8443 ssl;

	server_name xxx.mou.science;

	ssl_certificate /etc/letsencrypt/live/xxx.mou.science/fullchain.pem;
	ssl_certificate_key /etc/letsencrypt/live/xxx.mou.science/privkey.pem;

	ssl_stapling on;
	ssl_stapling_verify on;

    location /.well-known {
		alias /var/www/xxx.mou.science/.well-known;
	}
	location / {
		proxy_pass https://www.google.ca;
		proxy_cookie_domain google.ca xxx.mou.science;
		proxy_set_header Accept-Encoding "";
		proxy_set_header User-Agent $http_user_agent;
		proxy_set_header Accept-Language "zh-CN";
		proxy_set_header X-Real-IP $remote_addr;
		proxy_set_header X-Forwarded-For $proxy_add_x_forwarded_for;
		proxy_set_header X-Forwarded-Proto https;
		proxy_set_header Cookie "PREF=ID=047808f19f6de346:U=0f62f33dd8549d11:FF=2:LD=zh-CN:NW=1:TM=1325338577:LM=1332142444:GM=1:SG=2:S=rE0SyJh2W1IQ-Maw";
		subs_filter www.google.ca xxx.mou.science;
        subs_filter ssl.gstatic.com yyy.mou.science; # 这个也需要反代,此处不演示。
	}

}
/etc/init.d/nginx restart
这时候应该就可以访问了。
参考:
http://blog.csdn.net/DBABruce/article/details/50905797